- Locations
- Interviews
- Luxury Home
- Luxury Lifestyle
- Luxury Travel
- Luxury News
- Events
- More
- Magazine
- Contact Us

Poor-quality images can ruin a great post. In the modern-day of social media, where the clock is ever-ticking, first impressions matter. This problem can be fixed in just a few seconds with an excellent-quality AI image enhancer tool. It sharpens, retains, and enhances lost details and brightens colors to make your photographs stand out. Selfie, product shot, travel shot, they all could be turned into a bright picture with the use of the right enhancement.
For this, you can use insMind’s image quality enhancer. It is fast and user-friendly. All you have to do is upload your photo, select the settings that fit your requirements, and the tool takes care of all technical requirements. New algorithms provide perfect lighting, texture, and resolution but do not compromise the picture’s natural appearance.
An AI image enhancer is a game-changer for any creator across a niche. It enhances image clarity, color, and detail. Improved visualization translates to even more branding, increased activity, and an even larger base.
It can help make a slightly blurry selfie on Instagram a high-quality post. A good quality image can get a user more likes, followers, and shares.
Low-quality TikTok thumbnails can look dull or blurry. The applications of an AI photo enhancer make them appealing, colorful, clear, and eye-catching- something to make viewers want to click.
Your LinkedIn photo is your main professional face when someone visits your profile. The image quality enhancer can smooth edges, adjust the lighting, and make you appear professional, thus standing out to recruiters and clients.
The increased sharpness of product images also shows more texture and detail to the Etsy seller. This gives credibility and makes your products appear more valuable.
YouTube creators need a clear and bright thumbnail. Titles can be more legible and colors more vivid, and enhance Click-through rates using AI image upscaler.
Whether it is personal selfies or professional product shots, AI technology helps every creator deliver their best work on the Internet quickly, easily, and with stunning results.
You begin by preparing your photo. Drag and drop it to the AI image enhancer, or even click to select it from your device. You can upload a single picture or up to 30 files at once with the premium feature. This is ideal when you are ready to improve an entire photo set in a single sitting. This saves time and makes your workflow smooth.
Choose the most appropriate one of your photos; use portrait, landscape, text, or product pictures. The tool is focused on such details as faces and textures. It is also possible to select the upscale size. The AI enhances the image, bringing out even greater clarity and sharpness in it and keeping colors looking natural.
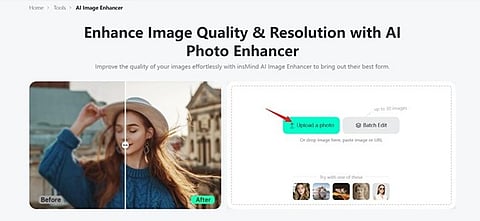
Look at the before and the after. When you like your result, simply click and you can download your HD image. It is also possible to share it directly on your social media.
An AI image enhancer brings the best results when you start with the highest-quality source. Always use the original file from your camera or phone, not a compressed version. Avoid screenshots, as they reduce resolution and cause pixelation and compression artifacts, which limit how much detail the tool can restore.
Good lighting is also essential for getting the best enhancement. Photos taken in even, balanced light give the AI more details to work with. This leads to sharper edges, brighter colors, and natural-looking skin tones. Soft daylight or well-lit indoor spaces work best.
To make the point even more effective, combine tools; those found in insMind and its HD Photo Converter can convert an ordinary picture into a high-definition one in a few seconds. Use it before or after your main edit to add extra clarity and detail.
Be sure to check on your results—comparison of before and after. Make sure the edit matches your style, bold and bright or soft and natural. In case, repeat or use another model to perfect the appearance.
These steps will help your AI-enhanced image turn out sharp, professional, and apt to make a statement on social media, online shops, portfolios, or marketing materials.
Your photo has not only improved. It’s empowered. With an AI image enhancer, you can bring dull, blurry snapshots to life and make them stand out, literally making them stoppable scrolls. It sharpens details, brightens colors, and restores clarity you thought was lost. On social media, in a professional portfolio, or in an online store, an impressive and unblur image attracts attention and induces confidence. A sharp Instagram selfie can enhance engagement. A good LinkedIn photo can lead to new, interesting job offers. A product photo that shows the detail can result in increased sales.
Inspired by what you read?
Get more stories like this—plus exclusive guides and resident recommendations—delivered to your inbox. Subscribe to our exclusive newsletter
The products and experiences featured on RESIDENT™ are independently selected by our editorial team. We may receive compensation from retailers and partners when readers engage with or make purchases through certain links.