- Locations
- Interviews
- Luxury Home
- Luxury Lifestyle
- Luxury Travel
- Luxury News
- Events
- More
- Magazine
- Contact Us

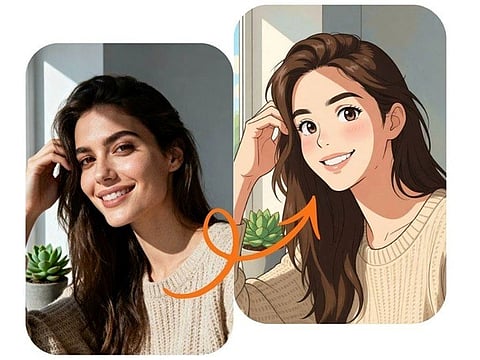
You’ve done it. After fine-tuning your prompt and generating a few variations, you have the perfect AI image. The composition is stunning, the colors are vibrant, and the concept is exactly what you imagined. There’s just one problem: it’s too small. When you try to enlarge it for a presentation, a social media post, or a print, it becomes a blurry, pixelated mess.
This is a common frustration for creators and marketers using AI image generators. The default outputs are often not large enough for professional use. Thankfully, the solution isn't to just "stretch" the image. The answer is AI upscaling, a process that intelligently rebuilds your image at a higher resolution, adding crisp detail instead of just making pixels bigger.
This guide will show you how to upscale your AI-generated images in 2026. We’ll cover the best tools for the job and provide a clear, step-by-step process to turn your low-resolution creations into high-quality masterpieces ready for any project.
Before we explore the right way to enlarge AI art, it’s important to understand why the old methods don’t work. For decades, the standard way to resize an image was through a process called interpolation. Software like Photoshop would look at the existing pixels and guess what new pixels should go in between them to make the image larger.
This works okay for small increases, but it fails spectacularly with the detailed and complex outputs from AI. When you try to double or quadruple the size of an AI image with standard resizing, you’ll see a few major problems:
Pixelation and Blur: The sharp lines and intricate textures in your original image become soft, blurry, and undefined. The result looks unprofessional and lacks impact.
Loss of Detail: Tiny details, like the texture of fabric, strands of hair, or distant elements in a landscape, get smoothed over and lost. The image feels flat and lifeless.
No New Information: Traditional resizing just makes existing information bigger. It can’t create new, believable detail.
AI upscalers work differently. They’ve been trained on millions of high and low-resolution image pairs. They don’t just stretch pixels; they analyze the content of your image, understand what it is (a face, a tree, a car), and then intelligently draw in new, realistic details to fill the extra space. It's less like resizing and more like re-rendering with a finer brush.
Choosing the right tool is the most important step in getting a great result. Your choice depends on whether you need a quick, dedicated upscaler for a finished image or a more integrated tool that’s part of your creative workflow. Here are the top-tier recommendations for 2026.
For creators who want a seamless workflow, a comprehensive tool is the best choice. This is where a powerful Image to Image AI suite like PhotoEditorAI shines. It isn't just an upscaler; it's a creative platform that lets you generate, refine, and enhance your visuals all in one place. You can use its features to guide the AI in generating a better base image, which makes the final upscale cleaner and more detailed. This integrated approach ensures your artistic vision remains consistent from the initial concept to the final high-resolution output.
Sometimes, you already have the perfect image and just need one thing: more resolution. For this task, you want a specialized tool that does one job exceptionally well. The Free AI Image Upscaler Online from EzRemove AI is a leading choice for its simplicity and power. It’s built specifically to take a finished image and increase its size by 2x or 4x without sacrificing quality. It excels at sharpening blurry details, cleaning up minor AI artifacts, and delivering a final product that looks like it was generated at the higher resolution from the start. Its web-based interface makes it accessible to anyone, without needing to download software.
Now that you know the tools, let's walk through the process. Following these steps will help you get clean, professional results every time.
The quality of your output is directly tied to the quality of your input. An AI upscaler can do amazing things, but it works best when it has good information to start with. Before you even think about upscaling, make sure you’ve generated the best possible source image.
Highest Initial Resolution: When using your AI image generator (like Midjourney or Stable Diffusion), always export the highest resolution version available. Don't screenshot the preview grid. Use the platform's built-in upscale or export functions to get the largest starting file.
Choose a Clear Output: If you have multiple generations of the same prompt, pick the one with the clearest details and fewest artifacts. An image that is already a little blurry or messy will only have those problems magnified when upscaled.
Use Lossless Formats: If possible, save your source image as a PNG instead of a JPEG. JPEGs are "lossy," meaning they lose a little bit of data every time they're saved. A PNG file preserves all the original detail, giving the upscaler more to work with.
Your goal determines your tool. Think about what you need the final image for.
For Creative Refinement: If you feel the AI-generated image is a great start but needs stylistic changes or more detail *before* getting bigger, use an integrated tool like PhotoEditorAI. You can use its image-to-image feature to re-render the image with a new prompt, which often results in a higher-quality output that you can then upscale further.
For Final Delivery: If you are happy with the composition, style, and details of your image and only need to increase its dimensions, a dedicated tool like EzRemove AI is the perfect choice. It’s a fast and direct path from a low-resolution file to a high-resolution one.
Let’s imagine you have a 1024x1024 pixel image of a futuristic cityscape. It looks great on your screen, but you need it for a large banner.
Using a dedicated upscaler like EzRemove AI, the process is straightforward:
Navigate to the website.
Upload your 1024x1024 pixel PNG file.
You'll typically be presented with options like 2x or 4x. For a banner, you'd want the 4x option, which will turn your image into a 4096x4096 pixel masterpiece.
Click the "Upscale" button. The AI gets to work. It identifies the buildings, windows, flying vehicles, and atmospheric haze. It doesn’t just enlarge them; it redraws them with finer detail. The edges of buildings become sharper, tiny lights on distant structures appear, and the subtle gradients in the sky become smoother.
After a few moments, your new, high-resolution image is ready to download.
Don't just download the image and assume it's perfect. Take a moment to inspect the results.
Zoom In: View the image at 100% magnification. Pan around and look at key areas like faces, text, or complex textures. Do they look natural?
Compare with the Original: Place the original and the upscaled versions side-by-side. Confirm that the upscaler preserved the original style and didn't introduce any unwanted changes.
Experiment with Factors: If the 4x version looks a little "over-processed" or artificial, try a 2x upscale instead. Sometimes a more conservative increase produces a more natural-looking result. You can always take the 2x result and run it through the upscaler again to get to 4x.
AI is powerful, but it's not perfect. Sometimes you might run into issues with your upscaled images. Here are a few common problems and their solutions.
Occasionally, an AI upscaler might get too aggressive with noise reduction, making surfaces like skin or stone look unnaturally smooth, like plastic.
The Problem: The AI misinterprets subtle skin texture or grain as "noise" and removes it entirely.
The Solution: First, try a different upscaling tool or a different model within the same tool, as they are trained differently. If that doesn't work, try a smaller upscale factor (like 2x instead of 4x). You can also use a photo editor to add a subtle layer of film grain back into the image to restore some texture.
This happens when the AI gets confused by a complex pattern or abstract shape and adds bizarre, unintended details. You might see strange webbing patterns, distorted faces in the background, or warped textures.
The Problem: The AI can't make sense of a particular area, so it "hallucinates" detail based on its training data.
The Solution: The best fix is to start with a cleaner source image. If that's not possible, try a different upscaler. You can also use an advanced technique called "tiling," where you crop the problematic section, upscale it separately (which often works better on a smaller piece), and then blend it back into the main image.
Generating a compelling image with AI is only half the battle. To make your creations truly useful, you need to master the art of upscaling. By ditching outdated resizing methods and embracing modern AI-powered tools, you can transform any AI image into a crisp, detailed, and professional-grade asset.
Whether you need an all-in-one creative platform like PhotoEditorAI or a fast and focused tool like EzRemove AI, the power to create high-resolution art is more accessible than ever. Stop letting pixel limits hold you back. Start upscaling your AI creations today and unlock their full potential.
Inspired by what you read?
Get more stories like this—plus exclusive guides and resident recommendations—delivered to your inbox. Subscribe to our exclusive newsletter
The products and experiences featured on RESIDENT™ are independently selected by our editorial team. We may receive compensation from retailers and partners when readers engage with or make purchases through certain links.